I have them all.
Ok I'll send her to you.
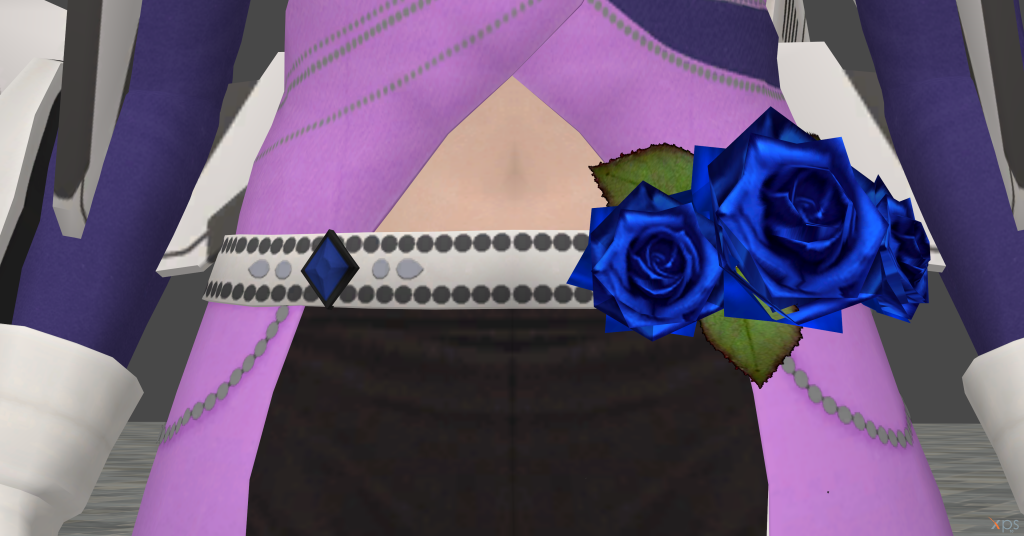
BTW, this new feature will be very useful for occluding this:
Because the diffuse looks like this:
XPS New Features
Moderators: ObscureMemories, Runa, Love2Raid
- iheartibuki
- Moderator
- Posts: 6552
- Joined: Sun Aug 19, 2012 9:59 am
- Custom Rank: Fappy Bird
- Location: The Land of the Free
- Contact:
-
- Porter
- Posts: 6322
- Joined: Mon Aug 20, 2012 12:57 pm
- Custom Rank: ßâÜ(ÔòÑ´╣ÅÔòÑßâÜ)
- Location: A house
Re: XPS New Features
So basically, this allows you to have 2 UV maps on any mesh part you want?
lol I don't get it even when it's explained. Explanation for n00b b00b ppl like me?
EDIT: I REALLY don't get this.
I'm trying to, but I just can't. Test model anyone? OhwaitIquitXNALarabutstill
lol I don't get it even when it's explained. Explanation for n00b b00b ppl like me?
EDIT: I REALLY don't get this.
I'm trying to, but I just can't. Test model anyone? OhwaitIquitXNALarabutstill
-
- Posts: 1068
- Joined: Wed Oct 17, 2012 5:09 am
- Custom Rank: Baebsae
- Location: Idk where am i?
- Contact:
Re: XPS New Features
Hope it's okay that i answer this here but i kind of explained it to the author himself so i guess i could help with questions regarding this
Here's the test Environment model i used on the explanation in the journal: http://dfiles.eu/files/pv8q9zrfe
(The environment was ported by Runa, it's a great port and easy to understand so it should work okay as a example)
If you load the .mesh or .mesh.ascii file with the ''load generic item'' function in XPS you'll see the shaded model with baked AO maps, just like we usually do for characters. You can compare it to the .obj model, which is the original model without shading.
When you load the .mesh.ascii model into Blender, go to edit mode on the 'container' mesh and open the UV/Image Editor. You will see the UV perfectly matching the diffuse. However there are more than one container, so if you'd bake a AO map like this it will most likely screw up because there are multiple objects casting shadows on the different containers.
Usually you would need to split the mesh per container and bake a AO map for every single one of them to avoid shading problems. On bigger environments it would mean hell of a lot work and i doubt anyone wants to bake hundrets of AO maps for any model at all.
With the new feature of having two UV layers you can just create a new UV map without actually destroying the old one. (If you'd simply create a new UV map for the containers the whole diffuse wouldn't display correctly on the mesh anymore)
You do that by adding a new UV layer. I like to compare UV layers to the layers you can have in image editors like Gimp or PS. Whatever you do on the new layer does not affect the other layer. This means you can create a UV map that does not overlap at any place for all containers at once and get a perfect baked AO map.
To illustrate what i just said and to explain here are two images that sum up the Blender part:
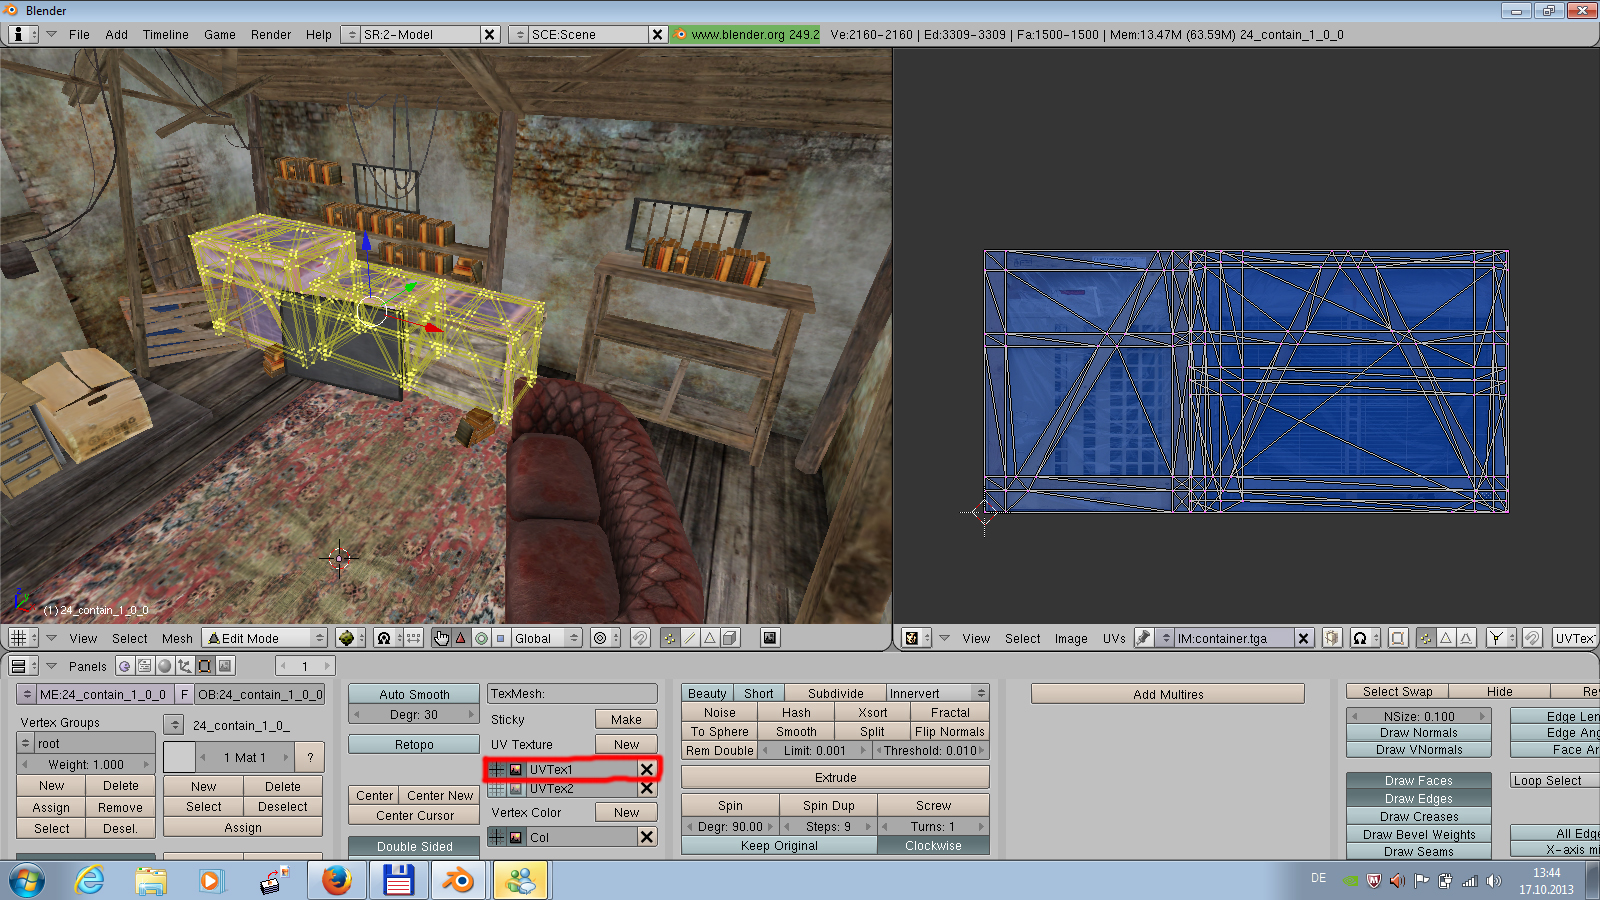
The red marked part tells you that you are displaying the first UV layer right now. A look in the image editor tells you that the diffuse is just perfect on this UV layer, but since evry Container overlaps it is not possible to bake a proper AO map like this.
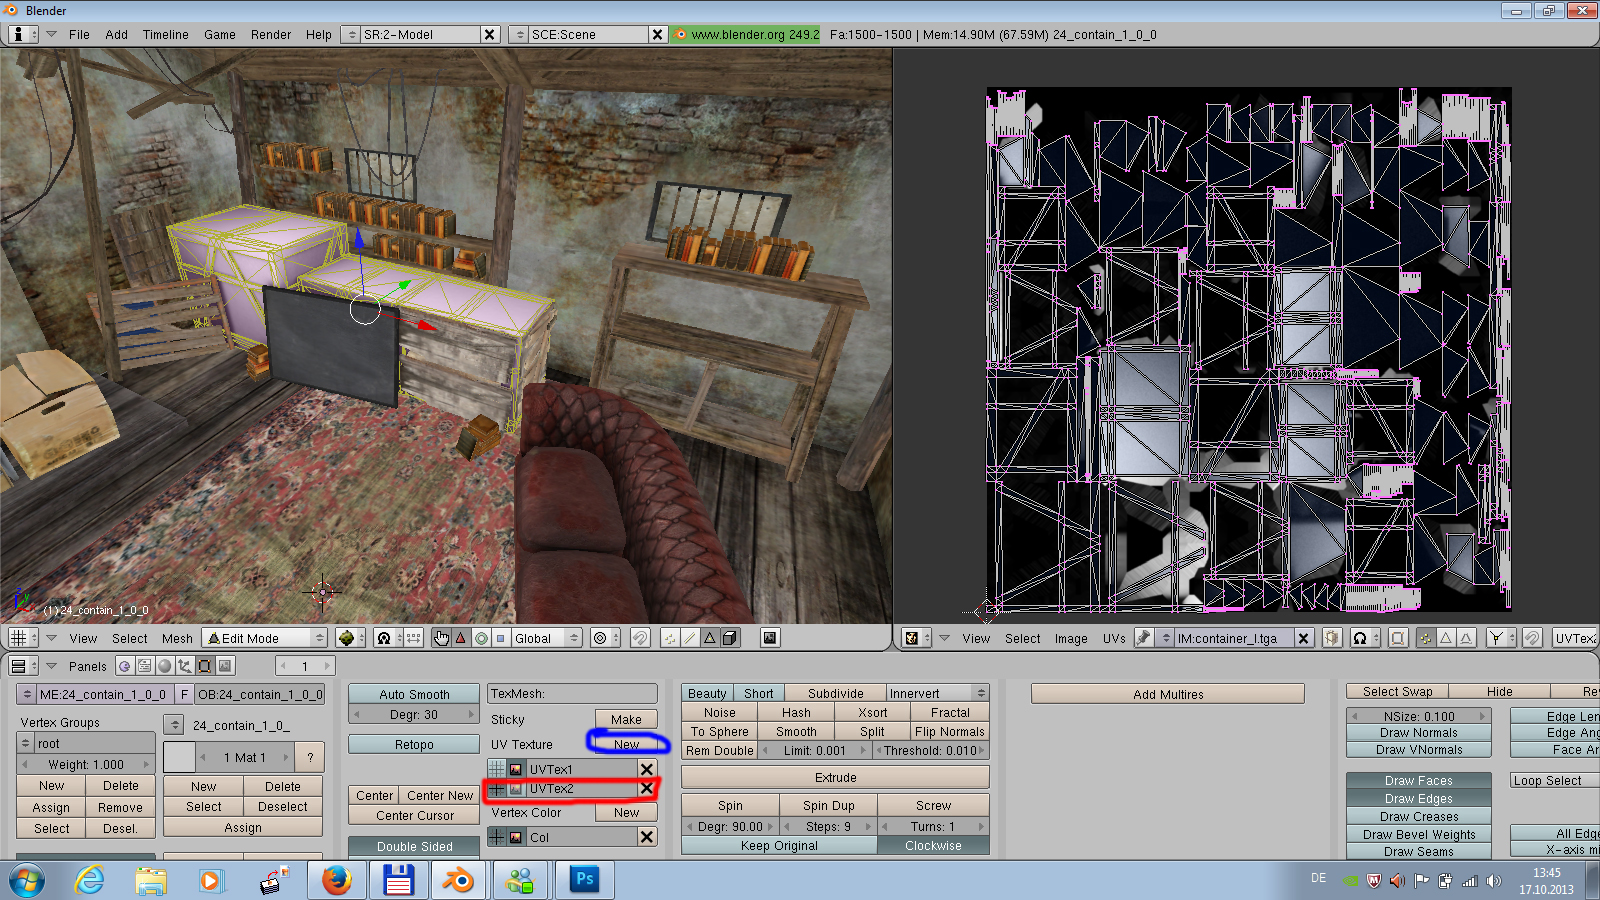
The red part here shows that you are now displaying the second UV layer. I created that by pressing the blue 'New' button. After you did that the UV map will not be Unwraped yet. You need to press U in edit mode and i usually chose the settings on the end of this image: http://fc00.deviantart.net/fs70/f/2013/ ... 6qgcj7.jpg
It will create a not directly beautiful UV but this one will not overlap at any place. Means you can bake a AO map that won't have any shading issues.
Last step to make it work in XPS is here:
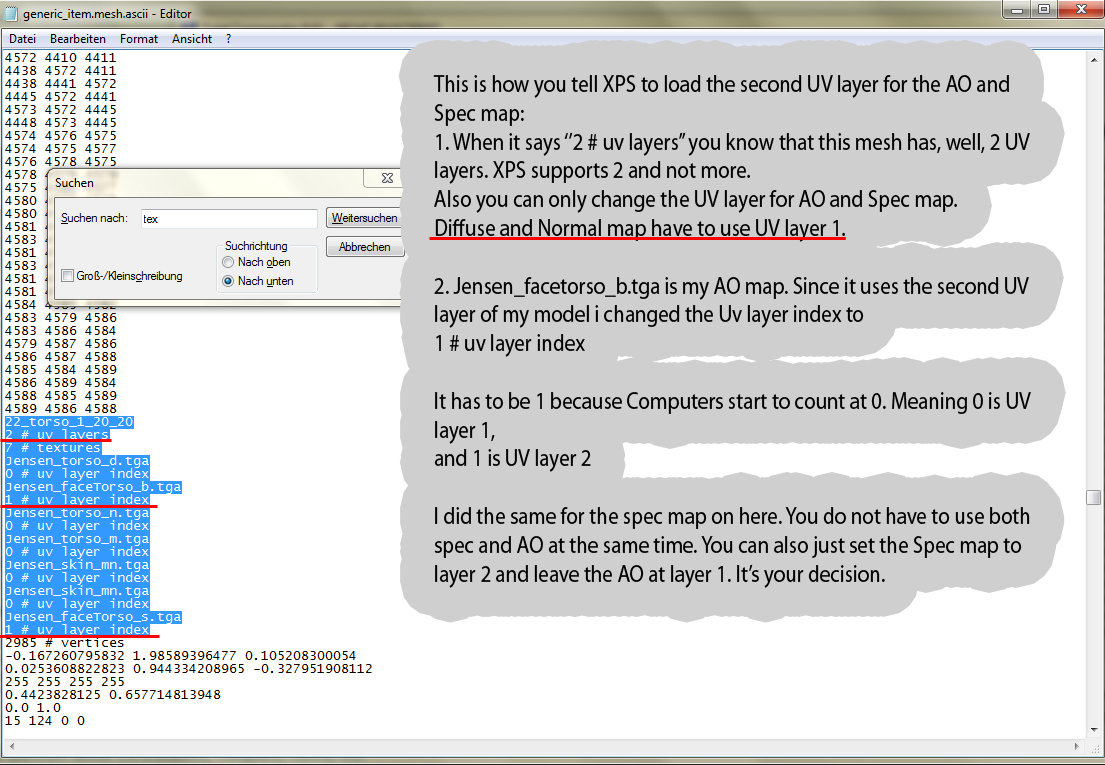
Note that only AO and Spec maps have support for two UV layers yet. Diffuse and Normal map will be loaded forced on UV layer 1. So logically this feature will only work with render groups that have AO and/or Spec maps.
PS: Thanks to semory again for the epic Deus Ex scripts Can finally port these damn models properly xD
PS2: You guys also gotta love the upcoming new feature =) Esp for those damn DOA models with their 500887858 bones^^
Last edited by PoophairJones on Thu Oct 17, 2013 5:03 am, edited 1 time in total.
- semory
- Site Admin
- Posts: 7755
- Joined: Sat Aug 04, 2012 7:38 pm
- Custom Rank: Kitty pu tu tu lay!
- Location: Torrance, CA
Re: XPS New Features
cool, thanks for the information angela, can't wait to see some ports using this new feature.
- raidergale
- Porter
- Posts: 2632
- Joined: Sun Nov 04, 2012 7:36 am
- Custom Rank: Marie's my waifu kthx
- Location: Italy
Re: XPS New Features
Thank you very much for that explanation, it'll be useful
And this is quite interesting too.:Someone:. wrote:PS2: You guys also gotta love the upcoming new feature =) Esp for those damn DOA models with their 500887858 bones^^
- raidergale
- Porter
- Posts: 2632
- Joined: Sun Nov 04, 2012 7:36 am
- Custom Rank: Marie's my waifu kthx
- Location: Italy
Re: XPS New Features
Nope, you can read on dA that it's a way to easily pose stuff like hands etc...
If you double click a bone you'll rotate that bone and each of its parented bones at the same time, allowing you to create an easy fist pose, for example
- Dazzy
- Site Admin
- Posts: 10369
- Joined: Sat Aug 18, 2012 3:15 am
- Custom Rank: WestAllen best ship.
- Location: With Grant Gustin :ggl:
- Contact:
Re: XPS New Features
Oh, wow, nice feature! I should probs move over to XPS Or at least try out these new features.
-
- Porter
- Posts: 6322
- Joined: Mon Aug 20, 2012 12:57 pm
- Custom Rank: ßâÜ(ÔòÑ´╣ÅÔòÑßâÜ)
- Location: A house
Re: XPS New Features
I think I may have understood this more now. Thanks Angela!
I will try this out on my Kingdom Valley model, but since I quit XNALara for a bit, it will take a while.
But yeah, I always wanted to improve my scenery porting! I know it can be used on regular models like Adam Jrnsen one. Actually, this may work on those Bone models
I will try this out on my Kingdom Valley model, but since I quit XNALara for a bit, it will take a while.
But yeah, I always wanted to improve my scenery porting! I know it can be used on regular models like Adam Jrnsen one. Actually, this may work on those Bone models